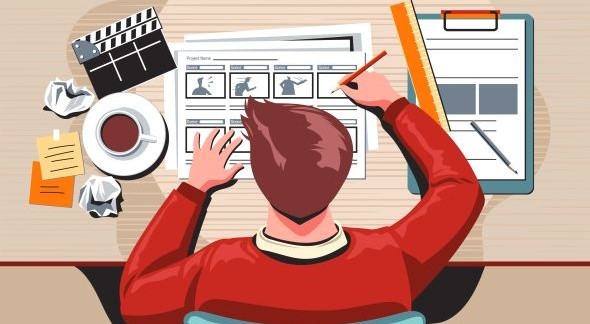
Ten Tips On Making The Perfect Storyboard
Bringing a story from script to screen feels like magic. Yet, behind every great video, film, or animation, there’s a secret weapon: the storyboard. This visual blueprint lays out every shot. Skipping this vital step, or rushing through it, often leads to confusion and wasted time during production. You might find your team isn't sure of the director's vision, or shots don't flow as planned.
Filmmakers and content creators often struggle to show their ideas clearly. How do you ensure everyone sees the same picture? Storyboarding is the answer. It bridges the gap between words and visuals. It brings clarity, boosts communication, and makes your entire project more efficient.
A perfect storyboard is your project's visual roadmap. It guides your crew from start to finish. Ready to learn how to make one? These ten actionable tips will help you craft a storyboard that streamlines production and makes your final piece shine.
1. Understand Your Narrative Arc
Deconstruct the Script
Every great storyboard starts with a deep dive into the script. Break down each scene, one by one. Find the key moments, what characters are feeling, and how the plot moves forward. Ask yourself: what's the main point or message of this specific scene? Really understanding this core message helps you know what visuals matter most.
Map Key Visual Moments
Once you know the scene's purpose, identify the crucial visual cues. Think about actions, emotional beats, or big revelations that need to pop on screen. These are the moments you absolutely must translate into clear frames. Pinpoint turning points and important character chats that will shape the story visually.
Define the Tone and Mood
The storyboard isn't just about what happens; it's about how it feels. Your drawings should communicate the intended atmosphere. Is the scene tense, funny, romantic, or scary? Use line weight, shading, and even simple color notes to suggest the project's style and emotional weight. This visual language ensures your audience feels the scene as intended.
2. Choose the Right Tools and Format
Digital vs. Traditional Methods
Deciding on your tools is a big first step. Will you sketch on paper, or use software? Traditional methods, like pens and paper, are quick for early drafts and need no fancy tech. Digital tools, such as Storyboarder, Procreate, or Photoshop, offer easy edits, cleaner lines, and better sharing for teams. Think about how much you need to collaborate and how often you'll make changes.
Standard Panel Layouts
Storyboards use specific panel layouts to show your vision. Think about common screen sizes, like 16:9 for widescreen films or 9:16 for vertical video. Different panel shapes can change how fast your story feels. A series of small panels might show quick action, while a large, single panel can slow things down. Choose the layout that best serves your story's rhythm.
Essential Information Per Panel
Each drawing isn't just a picture; it's a whole blueprint for a shot. Make sure every panel includes vital details. This often means the shot number, a brief scene description, any key dialogue, and notes on camera movement. Adding a rough duration for each shot can also help later with timing your overall piece.
3. Master the Art of Visual Storytelling
Focus on Composition and Framing
How you frame a shot guides the viewer's eye. Use rules like the rule of thirds to place key elements. Leading lines can draw attention to your subject. Thinking about depth of field helps focus on what's important. Good framing doesn't just look nice; it tells your audience what to feel and where to look.
Convey Emotion Through Character Expression and Body Language
Your characters don't need to be perfect drawings. Even simple stick figures can show big feelings. Emphasize their posture and facial cues. A slumped shoulder shows sadness; wide eyes suggest fear. These small visual choices are critical. They help the viewer connect with the characters without needing words.
Illustrate Camera Angles and Movement
The camera is your storyteller. Show clearly how it moves and where it looks. A low angle can make a character seem powerful. A high angle might make them appear small. Use arrows to show a pan or a tilt. Draw lines to suggest a dolly or zoom. Representing these details helps your crew understand the shot exactly.
4. Incorporate Essential Details
Dialogue and Sound Cues
Your storyboard needs more than just pictures. Place snippets of dialogue right next to the corresponding panel. Note important sound effects or music cues too. This integration ensures the audio side of your story is considered early. It helps the whole team grasp the scene's full impact.
Action and Blocking
Show exactly what characters are doing. Are they walking across the room? Picking up an object? Interacting with someone else? Detail their movement and how they use props. The overall blocking of a scene—where people and things are placed—should be clear within each frame. This helps actors and set designers do their job.
Lighting and Color Intentions
Even in a black and white drawing, you can suggest lighting. Use simple notes like "low key light" for a spooky scene, or "bright, natural light" for a happy one. You might even jot down basic color palettes. These visual cues reinforce the mood and narrative. They guide the director of photography and art department.
5. Iterate and Refine Your Storyboard
Seek and Incorporate Feedback
A storyboard is a team tool. Share your work with the director, cinematographer, and other key crew members. Their eyes can spot things you missed. Be open to their suggestions and constructive criticism. Taking feedback makes your storyboard stronger and clearer for everyone involved.
Test for Pacing and Flow
Once you have a sequence of panels, "flip through" them quickly. This method helps you get a real sense of the scene's rhythm. Does it feel too fast? Too slow? Do certain moments need more emphasis? This quick visual review helps you identify any pacing issues before filming even begins.
Adapt to Script Changes
Scripts can change, and your storyboard should too. Think of it as a living document. As the story evolves or new ideas come up, be ready to update your panels. A flexible storyboard saves you time and stress later on. It keeps everyone on the same page, no matter how the script develops.
6. Leverage Your Storyboard in Production
Directing and Cinematography Guide
Your storyboard becomes the director's and cinematographer's best friend on set. It serves as a clear reference for every shot. Directors like Alfred Hitchcock famously planned every frame with detailed storyboards. This ensures shots perfectly match the initial vision, leaving little to chance.
Communicating with the Crew
A well-made storyboard speaks volumes. It tells actors where to stand, set designers what to build, and visual effects artists what to create. This visual clarity stops misinterpretations. It saves precious time on set, avoiding endless questions and costly reshoots.
Pre-visualization and Budgeting Tool
Storyboards help you see your project before you shoot a single frame. This pre-visualization helps you spot potential problems early. It also aids in estimating production needs. You can better guess how many crew members, props, or special effects will be needed, helping you manage your budget.
7. Keep it Simple and Clear
Focus on Key Information
Avoid cluttering your panels with too much detail. Each frame should clearly show one main idea or action. Your storyboard is a guide, not a final piece of art. Keep your drawings and notes focused on what truly matters for that specific shot.
Avoid Over-Complication
Remember, storyboards are tools for communication. They don't need to be masterpieces. Simple lines, basic shapes, and clear symbols often work best. Don't spend too much time on tiny details that won't help the crew understand the shot.
Use Arrows and Symbols
To show movement, sound, or camera actions, use simple arrows and common symbols. An arrow pointing left might mean "pan left." A starburst could show an explosion. These clear marks make your intentions easy to grasp at a glance.
8. Maintain Consistency
Character Design Consistency
Your characters should look similar across all panels. While they don't need to be perfect, make sure their key features stay the same. This helps your audience and crew recognize them instantly, no matter the angle or action.
Environmental Consistency
If a scene takes place in a kitchen, make sure the kitchen looks like the same place in every shot. Maintain consistent details for set designs and props. This prevents confusion and keeps the visual world of your story believable.
Art Style Consistency
Stick to one overall drawing style throughout your storyboard. Whether it's rough sketches or more detailed drawings, keep it uniform. A consistent art style helps the storyboard feel cohesive and professional, making it easier to follow.
9. Think About Transitions
Visual Continuity Between Panels
Consider how one shot smoothly leads into the next. Does the character move off-screen in one panel and enter from the same side in the next? Good visual continuity makes your story flow. It prevents jarring cuts or confusing jumps for the viewer.
Editing in Mind
Draw your storyboard with the final edit in mind. Think about how the shots will connect. Are you planning a quick montage? A slow dissolve? Show these intended editing choices in your panels. This helps the editor understand your vision before they even start.
Time and Space Representation
Use your storyboard to show the passage of time or changes in location. A series of quick panels might show a journey. A blank panel with text could indicate a jump in time. Make sure changes in setting or time are clear to anyone viewing your boards.
10. Practice Regularly
Start Small
Don't try to storyboard an entire feature film right away. Begin with short scenes, a commercial, or even a simple animation sequence. Starting small helps you learn the process without feeling overwhelmed. It builds your skills step by step.
Study Other Storyboards
Look at professional storyboards from famous films or animated projects. See how top creators plan their shots. Notice their composition, camera cues, and how they convey emotion. There are many great examples available online or in "making of" books.
Draw Daily
Like any skill, storyboarding gets better with practice. Try to draw even a few panels every day. The more you draw, the more comfortable you'll become at translating ideas into visuals. This regular practice makes you a more confident and effective visual storyteller.
Conclusion
Creating the perfect storyboard may seem like a big job. Yet, breaking it down into these ten essential tips makes it much more manageable. You learned to deconstruct your narrative, choose the right tools, and master the art of visual storytelling. We explored how to include vital details, refine your work, and use it powerfully in production. Remember to keep things simple, stay consistent, and always think about how your shots will transition.
The core benefits are clear: enhanced clarity, improved communication across your team, and a smoother production process. All these elements work together to create a stronger final visual narrative. Don't skip this crucial step in your next project. Prioritize storyboarding and experience its transformative impact on your creative process. Make your stories shine!